
Passwordless authentication using MySQL Config Editor and Multi Host SQL Backups
Passwordless authentication using MySQL Config Editor and Multi Host SQL Backups
In this article, we are going to learn how to setup passwordless authentication for multiple MySQL servers for example
- MySQL Hosted on Premise
- Cloud Database services like AWS and others
- On Self Managed Server (Dedicated, VMs or Cloud Servers)
About MySQL Configuration Utility
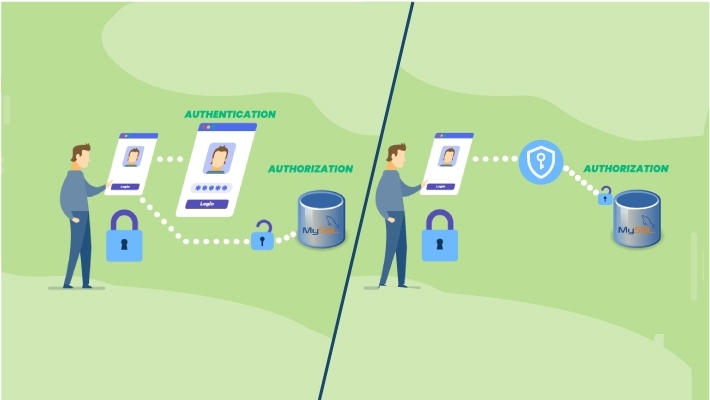
The mysql_config_editor utility enables you to store authentication credentials in an encrypted login file named .mylogin.cnf. The file location is the current user’s home directory on Linux and UNIX, and the %APPDATA%\MySQLdirectory on Windows.
The file can be read later by MySQL client programs to obtain authentication credentials for connecting to MySQL Server. The encryption method is reversible, so you should not assume the credentials are secure against anyone with read privileges to the file.
Rather, the feature makes it easier for you to avoid using plaintext credentials.
Programs use groups in the login path file as follows:
mysql_config_editor operates on the client login path by default if you specify no –login-path=name option to indicate explicitly which login path to use.
Without a –login-path option, client programs read the same option groups from the login path file that they read from other option files. Consider this command:
Prerequisites
- We need two MySQL Server for this article we are using AWS RDS instances
- One AWS ec2 instance with all the privileges to access the AWS RDS instances
- Minimum MySQL version is 5.6 (if you have lower then 5.6 MySQL Configuration Utility will not work)
Step 1:
Kindly.
$ mysql_config_editor set --login-path=your_profile_name --host=your_host --user=yourusername --password
Output
$ Enter password:
Note: enter your AWS RDS instance password
Step 2: Set Passwordless for RDS Instance and
2.1 Setting up the AWS RDS DDevOps_Demo1
$ mysql_config_editor set --login-path=ddevops_demo1 --host=ddevops_demo1.server --user=admin --password
$ Enter password:
2.2 Setting up the AWS RDS DDevOps_Demo2
$ mysql_config_editor set --login-path=ddevops_demo2 --host=ddevops_demo2.server --user=root--password
We here using private zones of AWS Route 53 which is attached on VPC, this way it is easier to remember the names of your services
$ Enter password:
Step 3: interact with profiles
Profile 1
$ mysql --login-path=ddevops_demo1
Output
mysql> show databases;

+--------------------+
 | Database           |
 +--------------------+
 | information_schema |
 | demo1_wordpress    |
 | demo1_magento      |
 | demo1_node         |
 | mysql              |
 | performance_schema |
 | sys                |
 | tmp                |
 +--------------------+
 08 rows in set (0.00 sec)
Profile 2
$ mysql --login-path=ddevops_demo2
Output
mysql> show databases;
+--------------------+
 | Database           |
 +--------------------+
 | information_schema |
 | demo2_magento      |
 | demo2_node         |
 | demo2_wordpress    |
 | demo2_laravel      |
 | mysql              |
 | performance_schema |
 | sys                |
 | tmp                |
 +--------------------+
 09 rows in set (0.00 sec)
Step 4: To view all login paths in clear text
$ mysql_config_editor print --all
Output
$ [ddevops_demo1]
  user = admin
  password = *******
  host = ddevops_demo1.server
  [ddevops_demo2]
  user = root
  password = *******
  host = ddevops_demo2.server
Step 5: Create a Backup Bash Script
Now we will create a backup script which will take SQL dumps of both the AWS RDS Instances
$ touch sqlbackup.sh
$ vi sqlbackup.sh
#!/bin/bash
# Script by DDevOps
date=`date +%Y%m%d`
fdate=`date +%Y%m%d-%H%M`
DBS1="$(mysql --login-path=demo1 -Bse 'show databases')"
DBS2="$(mysql --login-path=demo2 -Bse 'show databases')"
DIR=/backups/dumps

# Create required directories
if [ ! -e "$DIR" ]                # Check Backup Directory exists.
        then
        mkdir -p "$DIR"
fi

# Database Demo 1
echo "Taking Backup of Demo 1 MySQL Server"

#List User Databases
for db in $DBS1
do
 if [ $db != "information_schema" ] && [ $db != "performance_schema" ] && [ $db != "mysql" ]
 then
 echo "=============================`date`================================"
 echo "Taking Backup of Database : $db"
        if [ $db == "mysql" ]
        then
        mysqldump --login-path=demo1 $db --result-file=$DIR/$db-$fdate.sql
        else
        mysqldump --login-path=demo1 $db --result-file=$DIR/$db-$fdate.sql
        fi
 fi
done

# Database Demo 2
echo "Taking Backup of Demo 2 MySQL Server"

#List User Databases
for db in $DBS2
do
 if [ $db != "information_schema" ] && [ $db != "performance_schema" ] && [ $db != "mysql" ]
 then
 echo "=============================`date`==============================="
 echo "Taking Backup of Database : $db"
        if [ $db == "mysql" ]
        then
        mysqldump --login-path=demo2 $db --result-file=$DIR/$db-$fdate.sql
        else
        mysqldump --login-path=demo2 $db --result-file=$DIR/$db-$fdate.sql
        fi
 fi
done

 echo "================================================================"
 echo "Backups from Demo 1 and Demo 2 has been stored on $DIR"
Output:
$ ===================Tue Sep 14 13:43:21 UTC 2021==============================
 ===================Taking Backup of Demo 1 MySQL Server======================
 Taking Backup of Database : demo1_wordpress
 ====================Tue Sep 14 13:43:24 UTC 2021==============================
 Taking Backup of Database : demo1_magento
 ====================Tue Sep 14 13:43:26 UTC 2021==============================
 Taking Backup of Database : demo1_node
 ====================Tue Sep 14 13:43:28 UTC 2021==============================
 Taking Backup of Database : sys
 ====================Tue Sep 14 13:43:33 UTC 2021==============================
 Taking Backup of Database : tmp
 ===================Taking Backup of Demo 2 MySQL Server======================
 Taking Backup of Database : demo2_magento
 ====================Tue Sep 14 13:43:24 UTC 2021==============================
 Taking Backup of Database : demo2_node
 ====================Tue Sep 14 13:43:26 UTC 2021==============================
 Taking Backup of Database : demo2_wordpress
 ====================Tue Sep 14 13:43:28 UTC 2021==============================
 Taking Backup of Database : demo2_laravel
 ====================Tue Sep 14 13:43:28 UTC 2021==============================
 Taking Backup of Database : sys
 ====================Tue Sep 14 13:43:33 UTC 2021==============================
 Taking Backup of Database : tmp
Step 7: Verify the backup
By this command we can verify our backups is created or not it will give us all the details regarding to backup files or directories.
$   ls -l /backups/dumps/
demo1_wordpress-20210902-1954.sql
demo1_magento-20210902-1954.sql
demo1_node-20210902-1954.sql
demo2_wordpress-20210902-1954.sql
demo2_magento-20210902-1954.sql
demo2_node-20210902-1954.sql
demo2_laravel-20210902-1954.sql